


Today I am using the owl and the Designer paper called Spooky Night. Together these make decorating this box so easy. The box itself is one of my favorites. [Read more…] about 12 Weeks of Halloween Project #6
Merry Café card
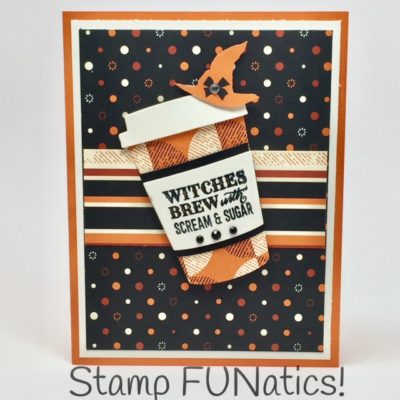
I have a cute Merry Café card for you today. I cased this card from Angie Juda and switched the paper up a bit Stamp FUNatics! way. This set coordinates with the Coffee Café bundle in our Annual catalog. The set I am using today is from our Holiday catalog called Merry Café.
A few spots left in Club

We have a couple of spots left in Club. Join us this month and get in on savings.
12 Weeks of Halloween – Project #5
Welcome to week #5 of my 12 Weeks of Halloween. When I think of Fall, I think of pumpkins, cooler weather, beautiful colors and Halloween. I hope you enjoy my card.
2017 Holiday Catalog and Stamp FUNatics Favorites
Watch my video on our New Holiday Catalog. I also have a 3-D project at the end. Don’t miss it.
12 Weeks of Halloween – Project #4
Welcome to Week #4 of my Twelve Weeks of Halloween. Today’s project reminds me of Fall and all the pumpkins and jack o lanterns.
12 Weeks of Halloween – Project #3
Welcome to Week #3 of my 12 Weeks of Halloween. Today I have a cute Halloween Treat box using the new Pizza Box and our Spooky Cat bundle and Designer Paper.
12 Weeks of Halloween – Project #2
I have started designing my 12 Weeks of Halloween. This week we are on project #2. If you missed week one, just go to You Tube and you will see Week 1. Don’t forget to subscribe, so you don’t miss any more. [Read more…] about 12 Weeks of Halloween – Project #2
12 Weeks of Halloween – Project #1
I love decorating the house for Fall and Halloween and to see the children come to the house all dressed up. I love the fun side of Halloween, not the scary or gory side. [Read more…] about 12 Weeks of Halloween – Project #1
Holiday Catalog Sneak Peek
I received my new Holiday catalog Haul. I wanted to share it with all of you. They have some great new products coming out September 1st. I was able to order early as one of the perks of being a Demonstrator. If you can’t wait, let me know and we would be happy to have you join our Team FUNatics family.