


Hi Stampers,
Can you believe tomorrow starts the first day of Fall?
This past weekend, I got out my Fall decorations and the house now feels cozy with warmer colors, plaids and pumpkins.
I start getting into gear for all the upcoming Holidays, when Fall begins. That means Halloween projects, Fall baking and pumpkin muffins and the start of Chirstmas cards.
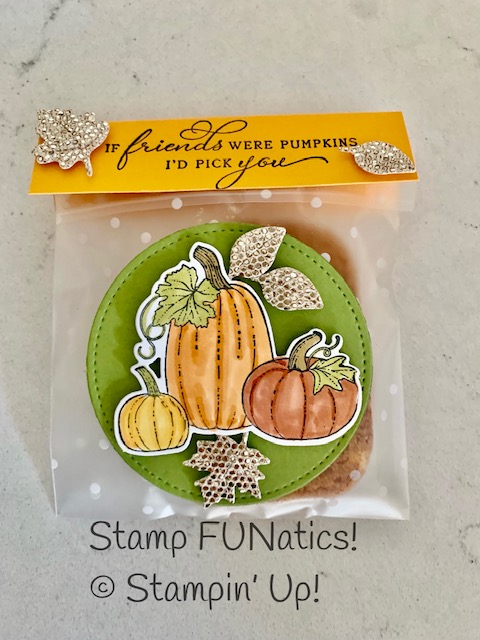
I joined a bible study at my new church and our group was responsible for wrapped snacks. I knew exactly what I wanted to do. I got out my Pretty Pumpkin stamp set and matching dies and started stamping, coloring and cutting. ( you can save 10% by purchasing the bundle.# 156478. This set is so elegant. The fonts are pretty and the pumpkins and dies boost pumpkins to the next level. I went to Costco for their variety pack cookies. They were the perfect choice, when you have so many to make. I put my tray out and people wanted to know where I got the cute wrapped cookies. Everyone loved them. It was a great way to ice break and make more friends. Here is a close up of the Cookie. I also got the cute polka dotted bags on Amazon.
They came out so colorful and the leaves were cut from our Sale-a-Bration FREE “Be Dazzling” designer paper. This paper was so popular, it has already sold out. Fortunately, I have 3 extra packs and will share them with you. See my special below.
Don’t forget Sale-a-Bration ends Sept. 30th, so you don’t have alot of time to get those last FREE products you have wanted. With my special, it’s like getting double Sale-a-Brations.
I have all the supplies and instructions:
Instructions:
Place cookie in self sealing bag. I placed them with the seal to the front and the back of the cookie to the front. That way they can turn to the back to see what flavor cookie it is.
Cut a circle out of Old Olive cardstock. I used the stitched circle dies that have retired, but you can use the layering circle dies.
Stamp and color the pumpkins. I stamped in Memento ink and colored with the blends. I colored the stems in Soft Suede and Old Olive Blends. I used the dark markers to go over the highlighted lines and then blended with the lighter color. Cut out the pumpkins with the matching die. Attach to the circle with dimensionals.
Die cut leaves using the Giving Gifts dies and Be Dazzling paper. Attach as seen in the photo with dimensionals and mini dimensionals. Attach the circle to the front of the bag with Stampin Seal +.
Cut a piece of the Mango Melody paper 2″ X 4″ and score at 1″ on the 2″ side.
Stamp the saying in Black Memento ink,
Add Tear & Tape to the inside of the header and attach to the top of the bag. Add some more leaves with dimensionals.
I got the bags on amazon. The link is in the description.
 |  | |
 | ||
 |  |  |
 |  |  |


 Specialty Paper")


